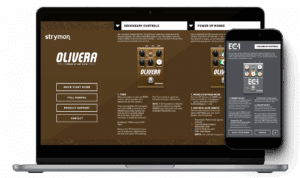
Secondary Controls & Power Up Modes Cheat Sheet 2.0: EC-1 and Olivera
Our handy secondary functions cheat sheet has gotten a big update! Version 2.0 now includes both Olivera and EC-1, as well as some big improvements
Financing Available Through ![]()
Welcome back to Part II of our blog series on live looping! Last time we talked about a number of the options to consider when choosing a looping product or platform, and this time we’ll cover five different practice ideas you can use to improve your ability to play something into a looper and have it repeat properly over time.
I need to say at the outset that part of being a good loopist is being an accurate player, and there’s not really an easy way to get around that part. Even if the punch in and punch out is being controlled by an accurate MIDI clock so that it’s technically perfect, if the playing inside the loop isn’t in time it will still feel disjointed when the loop repeats. That means that part of what we need to practice here is our instrument, not just controlling the looper.
There are two facets to getting a solid freeform loop that repeats properly — you need to tap the footswitches accurately in time to punch in and out at the right time, and you need to play consistently so that the loop repeats and feels good as long as it plays. We’ll tackle both things in this blog.
A bit of back story on me — I’m a student of technique in general, whether it be left-hand position on a guitar, a golf swing or properly creating a brunoise with a chef’s knife — because it’s all the same thing to our bodies and our brains. And just like building muscle in the gym, it can sometimes be a good idea to split the practicing of a technique into smaller parts. So when I do sit down (ahem — rarely) to practice guitar, I will usually do some exercises that focus only on the left or right hand for part of the practice time, so that I can really concentrate on getting each one right before I combine them. We can do some of the same thing here.
1. Before a looper even comes into the picture, you need to condition your brain and your fingers to be able to think in parts. As a long time session player and producer my mind automatically thinks this way when I’m playing behind someone as the sole accompanist — a pop tune has drums, bass, rhythm parts, sustaining pads, answering bits, backup vocals and lead instruments. Trying to cover all of that is impossible by yourself, unless you want the audience to wait ten minutes while you build each track up loop-by-loop, so you need to be selective about what you’re able to play, and what parts are important to help people know and love the song you’re playing.
An exercise you can use to help foster that kind of thinking is to learn how to play simple lead and rhythm at the same time. Try this: find a chunky rhythm part that you can play that is very simple — all straight eighth notes — and make it a short enough part that you can just play it and make it feel good continuously. Once it feels good, play the part for a bar and a half and then lay out for the last two beats. Start playing again on the downbeat of the next bar. Now you have a rhythm part that feels good, and a gap of two beats where nothing happens. If you can play that for a bit and make the gap feel natural (meaning that it doesn’t take a moment for you to find the groove again after the gap and it’s just seamless), then start throwing in a higher note in that gap that makes sense with the chord. That’s the solo. Keep doing it, and throwing more and more notes into the gap until it feels like someone is playing rhythm and someone else is playing lead. The better you get at it, the more you can vary the length of the rhythm and the gap, and make it feel much more organic. Getting good at this sort of thing can make or break a small ensemble, and it’s one of the things are that absolutely necessary to be able to do in a trio situation with bass and drums, for instance. You can hear an example of what I’m talking about starting at 1:50 on this Flint V2 video, where I had to play rhythm and solo at the same time as the drums dropped out and the tune faded away.
2. Exercise #1 dealt with your instrument, and now we need to start interfacing with the looper. It doesn’t matter if your looper has only one footswitch, or if it has one each for punch in and punch out — we need to get used to how long it physically takes for the punch to happen. Some inexpensive units have a bit of a processing lag before your tap translates into a punch, and some are basically instantaneous. You need to know how yours works.
To get an idea about what’s going on, try this: find something rhythmic to play that is simple to execute and at a medium tempo. Play your rhythmic part and tap your foot along in time, and get to the point where you can tap your foot and play the part in sync. In an ideal world your foot on the floor and your fingers on the guitar should land at precisely the same time. Once you get the sync between your fingers and foot pretty close, move your foot into position in front of the looper, and keep playing and tapping your foot. When you feel good about it, move your foot so that the tap of your foot hits the footswitch on the looper, and tap once at the beginning of the bar, and tap once again on the downbeat of the next bar. If your loop plays back seamlessly with no hiccups you’re doing great! Listen to the result and then do it again. What you’re looking for is the speed of the punch in and punch out — if you don’t notice a lag at all that’s great, and you can just focus on playing. If it always seems to punch in and out a bit late or a bit early, you’re going to have to compensate for that with your foot (or get a better looper 😜). Keep practicing as long as it takes to be pretty dang accurate, where you can usually trigger a solid loop every time you try. It could take minutes, hours or weeks to develop the skill depending on your experience level, but keep at it — it can be a super cool arrow to have in your quiver.
3. Figuring out how to play some simple drum-esque sorts of patterns without pitches can really be helpful to performing certain songs, so it’s a good thing to try and practice. I use my whole right hand for this and sort of think about it like I’m doing some aggressive and staccato finger-picking. My thumb handles the kick drum, and my three other fingers do the snare bit. A clean tone on the guitar is important, and playing a bit closer to the neck with your right hand will probably help you get a deeper tone for the kick drum. Your left hand will need to help you mute the strings, but make sure that you’re not muting directly over the fifth, seventh or twelfth frets, so that your drum parts don’t get pitched harmonics in them that clash with the key of the song you’ll be playing.
Get to the point where you can play the beat for a few bars consistently, and then try and capture it in the looper. You will probably find that you have to pay more attention to your foot until you get used to it, because it won’t feel all that familiar to play non-pitched stuff. Once you can play a faux drum part and capture it so that it plays back repeatedly over time, you are most of the way there. I should also say that I sometimes experiment with a pitch shifter/lower octave sound when I’m laying down a drum-esque part, to better approximate the lower pitch of a kick drum. It works sometimes and totally doesn’t other times, so your mileage may vary.
4. Try putting a longer delay on your guitar sound, and come up with a part that bounces around and moves as a result of the delay. Think about something like the guitar part from “Another Brick In The Wall” by Pink Floyd, or “Bad” from U2 — it needs to bounce a bit and be part of the rhythm even when you aren’t playing anything. Once you’ve got a riff like that and you can play it continuously without a hiccup, try throwing it into the looper to see if you can get the looper to play it back seamlessly as well.
The reason for trying this as an exercise is that some of the part isn’t being created by you — the delay is doing it. So now you’re multi-tasking, dealing with keeping the delay riff consistent while figuring out how to punch in and out of the looper properly on downbeats that you may not be physically playing a note on the guitar on. It feels like a different musical and physical sensibility is required to get this to work properly with the looper, so that’s why it’s a great thing to practice.
5. Number five is SuperLevel™ for freeform looping, and it’s a real challenge. For this you’ll need to pick a modern song that was undoubtedly created to a click — it can’t be something that is just fairly solid tempo-wise, and instead needs to be something that literally doesn’t move at all — modern pop and dance music is great for this.
Find something rhythmic and very simple that you can play along with the song, and then try to create loops with your looper that play in sync with the music as long as possible without falling out of time. It’s really hard, but as you get better and better you’ll find that you can get pretty darn close with practice. In a live solo environment that kind of accuracy isn’t 100% necessary, but higher skill levels help no matter how simple the task. When I was getting my looping thing together ten years ago I got to the point where I could get a loop tossed into my HD500 to gallop along valiantly with a tune somewhat consistently, which made it much easier to do it when the stakes went much higher and I was doing full loops in a straight-ahead jazz context. Practice practice!
I hope that you’ve found this helpful, and if you have any additional ideas please comment below so that others can learn from you too!
More in a bit,
S..

Our handy secondary functions cheat sheet has gotten a big update! Version 2.0 now includes both Olivera and EC-1, as well as some big improvements

Explore Our First BigSky MX Preset Pack! As part of the latest Nixie 2 update, we’ve put together a free BigSky MX preset pack featuring sounds

If you happen to be one of those Strymon owners who know that their favorite units might have some extra capabilities but can’t remember exactly