Announcing Our Analog Giveaway Winners!
Our Analog Prototype Giveaway has drawn to a close. Thanks so much to everyone who took the time to create original artwork and mail it
Financing Available Through ![]()
Hey everyone! Nick here…first of all I just wanted to say thanks for taking the time to check out our Ultraviolet launch videos and all the kind words everyone left in the comments. I was surprised by the reactions to my speaker projection experiment in the Cloudburst & Ultraviolet Combos video so I thought I’d take a few minutes to talk about how I did it, because you can too!
This is great for stationary videos like this one, but can also be adapted to a variety of live and/or stage situations with the right projector.
Technically this will work with any piece of video or animation, but media that’s longer in length or shorter clips that seamlessly loop are ideal. Unless your playback device has the native ability to loop, make sure whatever you’re projecting is long enough to cover the entire duration of the shoot (and then some).There’s nothing worse than looking back after a flawless take only to see that the loop ended too early…I would be lying if I said that didn’t happen during this Ultraviolet shoot, luckily I had a few solid backup takes (phew!).
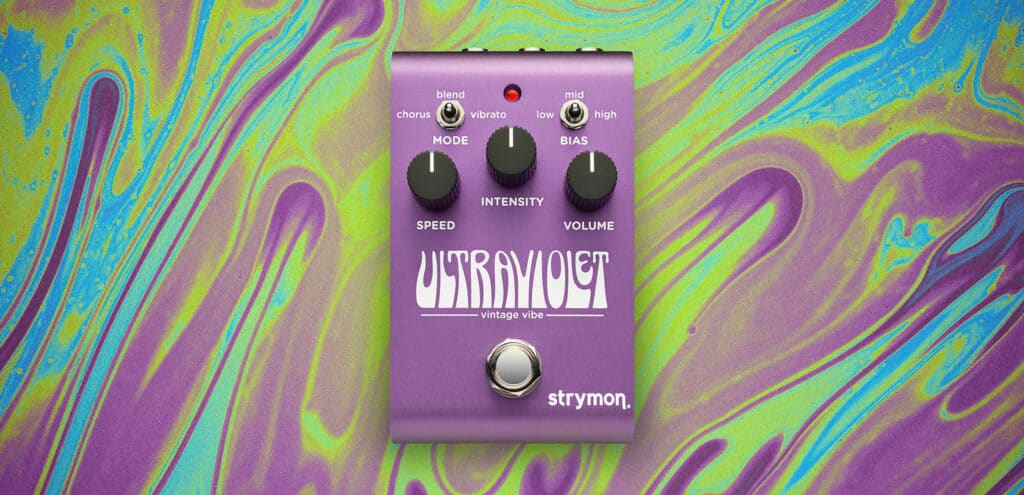
For this shoot I obviously wanted my background footage to have a visual connection to Ultraviolet, so I created the loop from the background of the key art (below).
There are a lot of programs and plugins that are great for creating loops, but I personally love one called PhotoMosh Pro more than most. It’s a really incredible image manipulator with a focus on music and creating visualizations (it even has MIDI support). I stumbled upon PhotoMosh years ago when it was only a web-based app, but since they rolled out their “Pro” version it’s become a staple in a lot of my workflows.
Using an Ultraviolet launch tune from Sean (Head of Marketing) as a tempo guide, I used PhotoMosh Pro to create a short kaleidoscope-inspired loop (below). Normally I work in at least 4K resolution for anything video related, but knowing this would just be slightly blurry in the background and how long PhotoMosh can take to render, I just stuck with 1080p.
So because my projector doesn’t have an (easy) way to endlessly repeat a shorter loop, I brought this render into Davinci Resolve and repeated it until the total length was about 45 minutes. It’s worth mentioning that you can do this easily in any modern video editing software, even iMovie – DaVinci Resolve is not required.
It should be no surprise that a projector is required for something like this. My wife and I love to watch movies outdoors so luckily I already had one that works great. If you’re curious, the one I use is from XGIMI and the model is a MoGo Pro 2. There are certainly cheaper options out there that will work just fine – so this is not the baseline by any means. It just needs to have the capability outlined in Step 3 (below) and be at least 200 Lumens (more = good).
This model is pretty small and light so I placed it on a short tripod close to the ground in front of my vintage Bassman where it would be hidden behind my chair when recording.
This is the most important step and in order for it to work your projector must be able to do Manual Keystone Correction, which is luckily fairly common – but not necessarily in every unit, especially in lower-end models.
Keystone correction lets you reshape the projected image to different surfaces to accommodate for off-axis projector placement. Essentially, you can place your projector at an angle if needed and then distort the image so it appears flat on the screen – very handy! Some cheaper projectors (especially under $200) will often just have the ability to focus the image, not reshape it with keystoning – so make sure to check first.
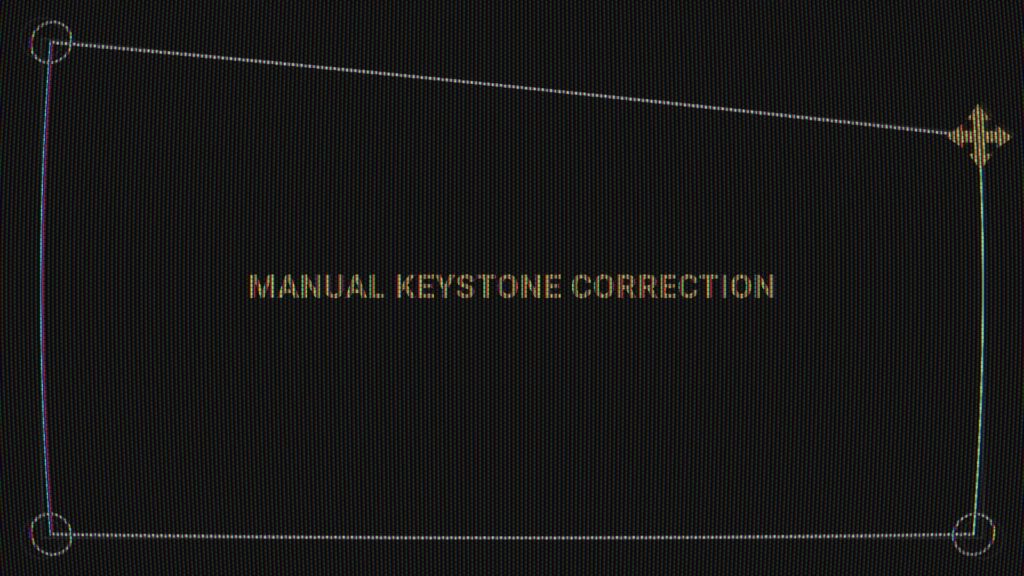
After this step, your image should be able to fit into most rectangular or square spaces – although it’s possible you might have to experiment with projector placement depending on the model and the space you’re working with. There are limits of course, for example you probably couldn’t put the projector six feet away from a surface and shrink it to the size of a pack of strings (although it never hurts to try…hmm).
Here is the projected image after manual keystone correction (below).
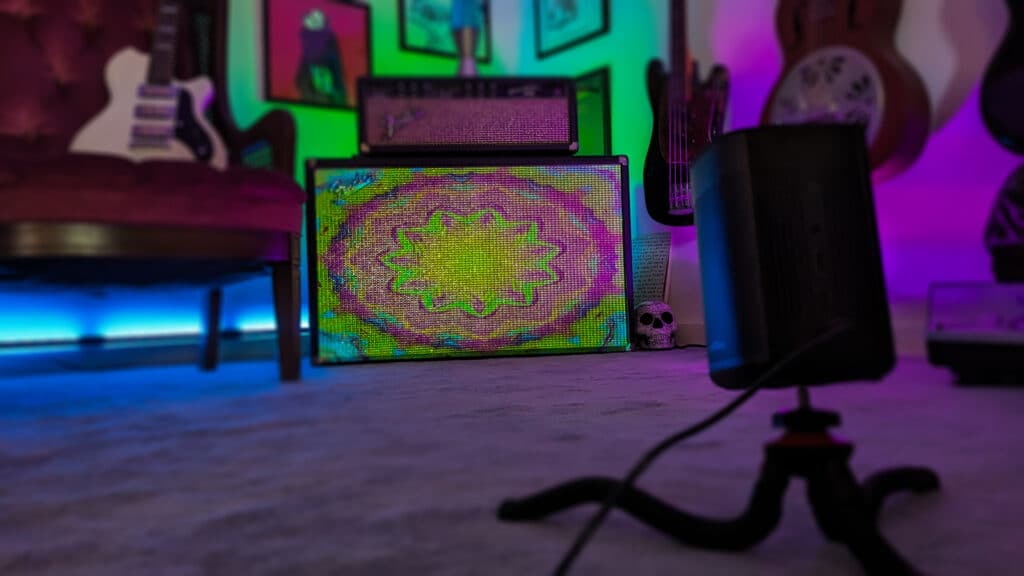
Well, that’s all – it’s a pretty simple process but definitely looks cool and has a ton of flexibility. You can use this same technique live on stage or really in any environment that isn’t too bright, depending on the projector you’re working with.
Thanks and I hope that was interesting!

Our Analog Prototype Giveaway has drawn to a close. Thanks so much to everyone who took the time to create original artwork and mail it

Live From Los Angeles! In the LA area and looking for something fun to do this weekend? Bring a guitar if you’d like and come
Our handy secondary functions cheat sheet has gotten a big update! Version 2.0 now includes both Olivera and EC-1, as well as some big improvements