No. Unfortunately it is not possible to add the new functionality to older blueSky, Flint, Lex, Deco, DIG, or El Capistan pedals. The electronic/mechanical designs are different and the hardware is not interchangeable.
Financing Available Through ![]()
Free US Shipping On Orders Over $49
Easy 30-Day Returns
Financing Available Through ![]()
Download the user manual, read FAQs or contact us if you need more help.
Looking for support information for V1 Lex (5 knob)? Click here for previous generation support information.
No. Unfortunately it is not possible to add the new functionality to older blueSky, Flint, Lex, Deco, DIG, or El Capistan pedals. The electronic/mechanical designs are different and the hardware is not interchangeable.
To begin using Lex with an external MIDI device, connect the MIDI out jack from a pedal, controller, or computer interface to the EXP/MIDI jack on Lex. The following devices can be used to send MIDI messages to Lex:
Set the EXP/MIDI jack to MIDI Mode
Once you have connected Lex to a MIDI source, you must set the EXP/MIDI jack to MIDI mode.
Set the MIDI Channel
Next, you will need to select a MIDI channel to communicate with Lex. Lex is set to MIDI channel 1 by default.
Set MIDI Output Mode
The MIDI Output mode must be set to determine what kind of MIDI data is sent out by Lex. ***NOTE: If you are only sending MIDI data to Lex or if you are using the Strymon MIDI EXP cable, the MIDI Output mode must be set to OFF.***
Once you have configured Lex to communicate via MIDI, you can set the pedal to synchronize to incoming MIDI clock.
When Lex is synced to MIDI clock, the echo repeats are synced to the incoming MIDI clock messages.
To set whether Lex will respond to incoming MIDI clock:
The MIDI Clock setting is saved per Favorite setting or MIDI preset.
***NOTE: Saved Favorite or MIDI presets on Lex will store the settings of all the knobs and toggle switches on the pedal as well as the bypass state of the pedal.***
With the EXP/MIDI jack set to MIDI mode, the currently loaded settings can be saved to any of Lex’s 300 preset locations at any time.
To enter Save mode, press and hold BOTH footswitches. Both LEDs will blink GREEN to indicate that Lex is waiting to receive a MIDI Program Change message.
Lex contains 300 preset locations, numbered sequentially from 0-299. Because MIDI Program Change messages have a maximum number of 128 (0-127) the presets are grouped into three MIDI patch banks:
NOTE: Some MIDI applications and controllers start with MIDI Program Change #1 instead of 0. In these setups, increment the MIDI Program Change numbers above by one.
Lex always powers up in MIDI Patch Bank 0, so if you plan to stay within the first 127 presets, simply send a standard MIDI Program Change message to load a preset.
If you will be using MIDI Banks 1 and/or 2, it is advisable to send a standard MIDI Bank Change message (MIDI CC# 0 with a value equal to the MIDI Bank#) before each MIDI Program Change.
Selecting bank 0, patch 127 will put Lex into Manual mode. In this mode, the pedal will be set to the current knob and switch settings. No preset data can be stored at this preset location.
When in MIDI mode, the currently loaded settings can be saved to any of
Lex’s 300 preset locations at any time.
Another way to save presets in MIDI mode:
Performing a Factory Reset restores the pedal to its factory default Power-up modes and secondary functions, and replaces all stored presets with their factory default settings.
To set the Input Level on Lex:
From the factory, Lex’s bypass mode is set to True Bypass with the option to be set to Buffered Bypass. There are several benefits to setting Lex to Buffered Bypass mode:
To change the bypass mode on Lex:
NOTE: Connecting a cable into the RIGHT OUTPUT jack will automatically set the bypass mode to Buffered Bypass.
– Press and hold the SLOW/FAST footswitch while powering up Lex. Once both LEDs flash, release the footswitch.
– Turn the VOLUME knob until the ON LED turns RED. Press either footswitch to store the setting.
To configure your Lex and MultiSwitch Plus to work with each other:
Press and hold the SLOW/FAST footswitch while connecting power to the pedal.Hold until both LEDs stop blinking.
Turn the SPEED knob all the way counter-clockwise to set the MIDI channel to Channel 1. The SLOW/FAST LED should be GREEN.
Turn the VOLUME knob all the way clockwise to set the EXP/MIDI jack to MIDI mode. The ON LED should be BLUE.
Press either footswitch to exit and store the MIDI channel, the MIDI OUT setting, and the EXP/MIDI jack mode.
Connect a TRS cable to Lex’s EXP/MIDI jack.
Press and hold the A footswitch on MultiSwitch Plus while connecting the TRS cable to MultiSwitch Plus to select Preset mode on MultiSwitch Plus.
To save a preset on Lex with MultiSwitch Plus:
Dial in the sound that you would like to save as your preset on Lex.
Press and hold both footswitches on Lex until both the LEDs blink GREEN.
Press the A, B, or C footswitch on MultiSwitch Plus to save the current state of the pedal to the desired location.
To select a preset on Lex with MultiSwitch Plus:
Step on a switch that is not illuminated to recall the corresponding preset.
Step on an illuminated switch to bypass Lex.
RJM switchers, when working with multiple MIDI devices, changing channels on the PBC sends program changes to all of your devices in order, so the first PC that is sent from your switcher will be the first MIDI channel built in to your switcher. Our pedals, when configuring to MIDI channels 4-16, will sync themselves to the channel of the first PC they see. Below are the necessary steps to properly set MIDI channels 4-16 with your RJM switcher:
– Hold 1 and 3 on the switcher to get into setup
– Select Edit Presets
– Select any preset
– Move to the Strymon pedal entry
– Set your Strymon pedal into MIDI CHANNEL MODE
– On the switcher, press Val – or Val +
– The Strymon pedal will flash to confirm that it has been sent a MIDI PC and is now configured
– Press Val – or Val + to correct the PC number you just changed
(because you just edited your preset)
– Press Exit repeatedly to get out of setup
Yes. Once you adjust the secondary function settings on your Strymon pedal they will not change after powering down your pedal until you manually change them again.
Each of our Strymon digital effect pedals (excludes OB.1) have the ability to be used with mono or stereo connections. Here are 3 different connection setups you can use with these pedals.
Mono Input => Mono Output
For Compadre, Riverside, and Sunset: Connect a standard mono TS instrument cable into the INPUT and connect a mono TS instrument cable to the OUTPUT of the pedal.
For blueSky and Ola: Connect a mono TS instrument cable into the LEFT INPUT and LEFT OUTPUT for a mono connection.
For BigSky, Mobius, NightSky, TimeLine, and Volante: Connect a mono TS instrument cable into the LEFT INPUT and LEFT OUTPUT for a mono connection. On the TimeLine and Mobius ONLY, make sure that the switch on the back of the pedal is set to STEREO IN/OUT.
For all other Strymon two footswitch Strymon pedals (including Iridium, Zelzah, and V2 pedals with mono/ stereo switch), connect a standard mono TS instrument cable into the INPUT and connect a mono TS instrument cable to the LEFT OUTPUT of the pedal.
Mono Input => Stereo Output
For Mono INPUT and Stereo OUTPUT on our small 2 footswitch pedals: Connect a standard mono TS instrument cable into the INPUT and connect a mono TS instrument cable to both the LEFT and RIGHT OUTPUTS of the pedal. (excludes Compadre, Riverside, and Sunset)
For blueSky and Ola: Connect a mono TS instrument cable into the LEFT INPUT and a mono TS instrument cable to both the LEFT and RIGHT OUTPUTS for stereo output.
For BigSky, Mobius, NightSky, TimeLine, and Volante: Connect a mono TS instrument cable into the LEFT INPUT and both LEFT and RIGHT OUTPUTS for stereo output. On the TimeLine and Mobius ONLY, make sure that the switch on the back of the pedal is set to STEREO IN/OUT.
Stereo Input => Stereo Output
For Stereo input and Stereo output on our small 2 footswitch pedals (except V2 pedals, Iridium, Zelzah, blueSky and Ola), you must first open up the pedal to move the internal jumper over the LEFT 2 pins to set the pedal for TRS Stereo input.
Once the pedal is set for TRS Stereo input, make sure to use a TRS Stereo cable into the INPUT and connect a mono TS instrument cable to both the LEFT and RIGHT OUTPUTS of the pedal.
For blueSky and Ola: Connect a mono TS instrument cable into the LEFT and RIGHT INPUTS along with both LEFT and RIGHT OUTPUTS for stereo input and output. The internal jumper on these pedals does not need to be adjusted to work in stereo and should be left in its default position (connecting the left 2 pins when viewed from below).
For BigSky, Mobius, NightSky, TimeLine, and Volante: Connect a mono TS instrument cable into the LEFT and RIGHT INPUTS along with both LEFT and RIGHT OUTPUTS for stereo input and output. On the TimeLine and Mobius ONLY, make sure that the switch on the back of the pedal is set to STEREO IN/OUT.
For V2 pedals, Iridium, and Zelzah: Using a TRS -> dual TS cable, connect the TRS stereo cable into the input of the pedal, and a mono TS instrument cable to both LEFT and RIGHT OUTPUTS of the pedal. You will need to flip the switch on the back panel of the pedal from MONO to STEREO to enable stereo input.
We recommend a power supply that provides 9VDC (center negative) with a minimum 300mA of current.
Do not subject your Strymon pedal to any voltage above 9V. Doing so will damage your pedal and void your warranty.
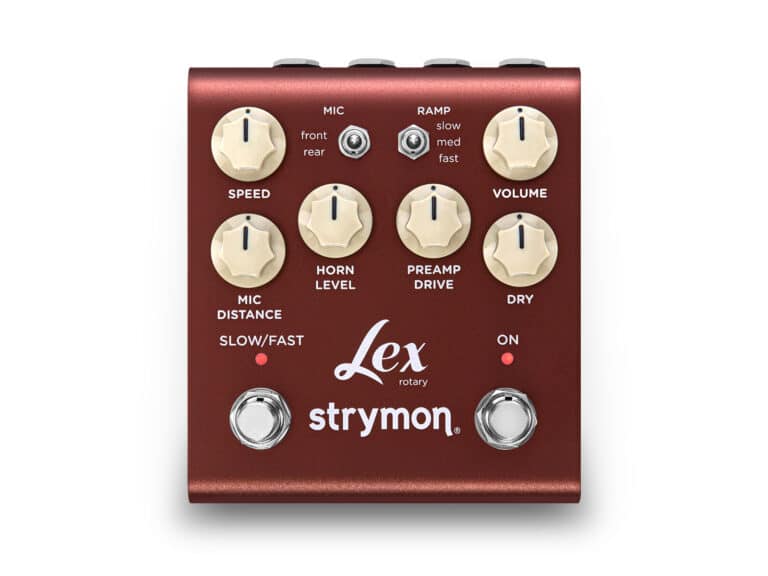
With Lex V2, we preserved the original sound and functions while updating the user interface for expanded I/O and control. These updates include:
We always work hard to improve the experience our customers have with our products. The release notes below list the new features we’ve added to Lex v2 and/or issues we’ve resolved. Download the Strymon Update software to update the firmware on your Lex v2 pedal.
Lex v2 Firmware REV v1.19 (Released September 2023)
What’s Fixed?
What’s new?
To update the firmware on your Lex v2 to the latest version, download and install our Strymon Update software from the following page:
System Requirements
macOS 11.6.4 or higher
Windows 10 or higher
Once you have downloaded and installed Strymon Update:
Strymon Non-Transferrable Limited Warranty
Strymon warranties its products and their varying components to be free from defects in material and workmanship for the following periods of time from the original date of purchase when purchased from an Authorized Strymon Dealer:
If the product fails within the warranty period, Strymon will repair or, at our discretion, replace the product at no cost to the original purchaser.
This warranty covers defects in manufacturing discovered while using this product as recommended by Strymon. This warranty does not cover loss or theft, nor does the coverage extend to damage caused by misuse, abuse, unauthorized modification, improper storage, lightning, or natural disasters. Damage caused by any of the above circumstances may result in a non-warranty repair fee.
Products that were purchased from an unauthorized dealer are not covered under warranty. The warranty is non-transferrable and does not cover used or second-hand products.
Products purchased outside of your country (sales channel) have a warranty inside the country it was purchased ONLY and is not valid outside of the country it was purchased. Please contact your dealer for information on warranty and service outside of the USA and Canada.
In the case of malfunction, the purchaser’s sole recourse shall be repair or replacement, as described in the preceding paragraphs. Strymon will not be held liable to any party for damages that result from the failure of this product. Damages excluded include, but are not limited to, the following: lost profits, lost savings, damage to other equipment, and incidental or consequential damages arising from the use, or inability to use this product. In no event will Strymon be liable for more than the amount of the purchase price, not to exceed the current retail price of the product. Strymon disclaims any other warranties, express or implied. By using the product, the user accepts all terms herein.
For North American customers: Contact Strymon through our website at https://www.strymon.net/support for Return Authorization and information. Proof of original ownership may be required in the form of a purchase receipt.
For Customers Outside the USA and Canada: Contact the Strymon dealer from which the product was purchased from in order to arrange warranty repair service.
To locate your nearest authorized Strymon dealer, please use the following link:
You can also contact Strymon directly at (805) 468-8788 or (800) 980-8160 for help finding your nearest authorized Strymon dealer.
Strymon products purchased from an authorized dealer are covered by a manufacturer’s warranty. A purchase receipt from an authorized dealer is required with any request for warranty service.
Please note that any Strymon products that have been purchased from an unauthorized dealer are not eligible for coverage under the manufacturer’s warranty. If you are uncertain, please contact Strymon directly at (805) 468-8788 or (800) 980-8160 before your purchase.
***NOTE: Warranties for Strymon products are non-transferrable. Second-hand items, including sales from websites such as craigslist, Ebay, and Reverb are not covered by a manufacturer’s warranty. ***
Your warranty is valid in the region of purchase. For example, if you buy your product in Japan, any service-related issues will need to be handled in Japan. Products purchased in the United States can only be repaired in the United States.