Download the user manual, read FAQs, or contact us if you need more help.
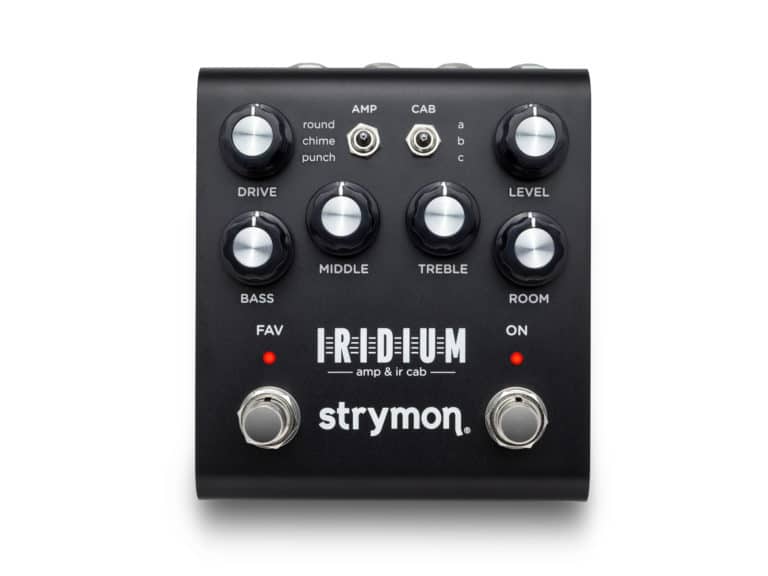
Iridium is an amp modeler that provides you with 3 classic tube amplifier circuits which can be paired with one of 9 ultra- realistic, full stereo Impulse Response (IR) speaker cabinets.
Every aspect of the amplifier’s circuitry has been mathematically modeled with absolute precision to deliver the response, feel, and inspiring experience of playing through the original amps at their best. Taking the process a step further, we’ve hot-rodded each amp to provide an extended range of tonal options beyond what was available from the original designs.
Iridium delivers full stereo 24bit 96kHz resolution for the entire 500 milliseconds of its speaker cabinet impulse responses, allowing you to use the very best impulse responses available. We have provided a curated set of 9 speaker cabinet IRs from top IR vendors Cabir.eu, Celestion®, Ownhammer®, and Valhallir.at.
Additionally, you can load your own IR files to Iridium’s 9 cab slots using our free Strymon Impulse Manager software.
Iridium features a hybrid room ambience design that combines 256ms impulse response captures of real rooms for realistic early reflections, with an algorithm for extended decay and modulation. This combination places your amp and cab in a natural sounding room, creating a space for your amp to open up and breathe. In addition to controlling the amount of room ambience, you can also choose a small, medium, or large room.
Iridium has a single input that will work with MONO or STEREO TRS input signals depending on the setting of the Input Selector switch on the back of the pedal. The input impedance is 1 Meg Ohm.
Iridium can accept Instrument (-10dB) or Line Level (+4dB) signals up to +8dBu. If using Line Level signals, please make sure to set the INPUT LEVEL to LINE.
***NOTE: Never connect the speaker output from an amplifier into Iridium!!!***
Iridium is an amp modeler and IR cab processor that can be used in a variety of ways. With both the amp and IR cab processing active, it is designed for:
It is not really recommended to be placed in front of an amplifier, but if you disable the IR Cab in Cab Bypass mode, you can connect Iridium’s output(s) into the Power Amp Input/Effects Return of an amplifier to use as the preamp for your amplifier.
Iridium’s LEFT and RIGHT audio outputs are 1/4″ unbalanced buffered outputs.
Iridium gives you the option to bypass either the amp modeling or the IR cab processing for different use cases. The ROOM processing is always active in any of these output modes.
To bypass either the amp or IR cabinet:
You can change the input level mode on Iridium to accept either instrument level (default) or line level signals.
To change the Input Level:
NOTE: The Input Level power up function persists through power cycles.
You can select from 3 different ROOM sizes (small, medium, and large) for the ROOM ambience feature of Iridium.
To change the ROOM size:
NOTE: The ROOM size is saved individually per preset.
On the back of the Iridium chassis, you will find the Audio Routing selector which selects the input audio routing for the pedal.
You can bypass either the amp or the IR speaker cab on Iridium if you desire. The ROOM processing is always active in any of these output modes.
To bypass either the amp or IR cabinet:
There is an output Level Trim feature on Iridium that allows you to adjust the output volume for both the 1/4″ Output and the Headphone output together without altering the level that is saved to a Favorite setting. It is essentially a global output level adjustment that does not affect the saved levels between your presets. It is also useful when monitoring with headphones.
NOTE: The LEVEL TRIM value is not stored as part of a preset and resets each time the pedal powers up.
You can set the EXP jack on Iridium to accept an expression pedal to act as a volume pedal that is placed either right before the amp modeling, or right after the IR cabinet, but before the ROOM ambience in the pedal’s internal signal routing.
***By default, Iridium’s EXP jack is set to Volume PRE mode from the factory.
To set the EXP jack to Volume PRE mode:
To set the EXP jack to Volume POST mode:
NOTE: EXP jack assignment persists through power cycles.
You can set the EXP jack on Iridium to accept an expression pedal for real-time control over any one or more of the knobs on Iridium in any direction.
To set the EXP jack to Expression mode:
NOTE: EXP jack assignment persists through power cycles.
To assign knobs to be controlled with the expression pedal:
NOTE: Expression pedal assignment is saved independently per Favorite/MIDI preset.
To begin using Iridium with an external MIDI device, connect the MIDI out jack from a pedal, controller, or computer interface to the EXP jack on Iridium. The following devices can be used to send MIDI messages to Iridium:
Set EXP jack to DIGITAL Mode
Once you have connected Iridium to a MIDI source, you must set the EXP jack to DIGITAL mode.
Set MIDI Channel
Next, you will need to select a MIDI channel to communicate with Iridium. Iridium is set to MIDI channel 1 by default.
The MIDI Output mode must be set to determine what kind of MIDI data is sent out by Iridium. ***NOTE: If you are only sending MIDI data to Iridium or if you are using the Strymon MIDI EXP cable, the MIDI Output mode must be set to OFF.***
With the EXP jack set to DIGITAL mode, the currently loaded settings can be saved to any of Iridium’s 300 preset locations at any time.
Iridium contains 300 preset locations, numbered sequentially from 0-299. Because MIDI Program Change messages have a maximum number of 128 (0-127) the presets are grouped into three MIDI patch banks:
Iridium always powers up in MIDI Patch Bank 0, so if you plan to stay within the first 127 presets, simply send a standard MIDI Program Change message to load a preset.
If you will be using MIDI Banks 1 and/or 2, it is advisable to send a standard MIDI Bank Change message (MIDI CC# 0 with a value equal to the MIDI Bank#) before each MIDI Program Change.
Selecting bank 0, patch 127 will put Iridium into Manual mode. In this mode, the pedal will be set to the current knob and switch settings. No preset data can be stored at this preset location.
You can perform a factory reset to clear out and restore all factory presets, expression pedal assignments, secondary functions, customized IR cabs, and power up modes.
To perform a factory reset:
Iridium’s LEFT and RIGHT audio outputs are 1/4″ unbalanced buffered outputs.
Iridium can output from instrument up to line level and is adjustable by its LEVEL knob and Level Trim secondary function. The Level Trim function can be used to boost or attenuate Iridium’s output without affecting the leveling between your stored presets.
Make sure to use headphones with an impedance between 25 to 70 ohms and with sensitivity as close to 100dB/mW as you can get for best performance with Iridium’s headphone output. The higher the impedance of your headphones, the lower the output volume of Iridium’s headphone output will be.
When using the headphone output on Iridium, this requires the pedal to draw more current than it normally would when the headphone output is not in use.
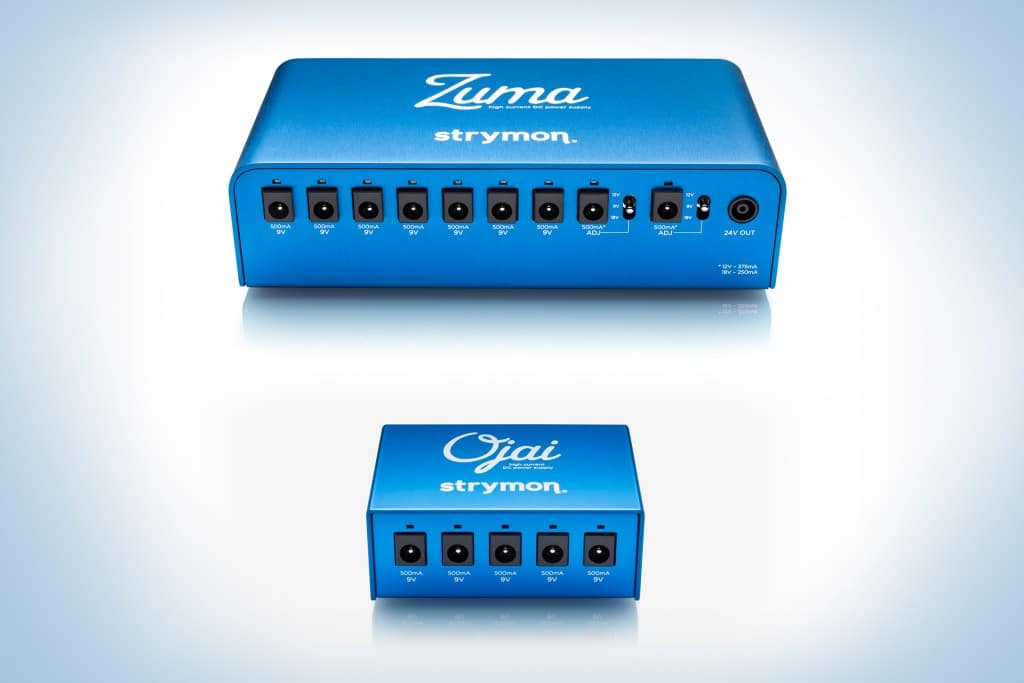
Iridium was designed as a an amp modeler solution in a pedal format that you can drop into any pedalboard. Like most other guitar pedals, it receives its ground connection via the 1/4″ output jacks. When listening to Iridium through the headphone output and using a wall adapter, there is no connection earth ground like there is with an amplifier. This causes some noise (hum) and is usually reduced when you ground the guitar by touching the strings. The adapter that is included with Iridium significantly reduces this hum when compared to similar parts. If an amplifier with an earth ground connection is available, then, the hum can be eliminated by connecting the LEFT or RIGHT OUT from Iridium to the input of the amplifier. The amplifier doesn’t need to be powered on for the ground to be provided. Power supplies like the Zuma and Ojai have much better filtering and isolation which will improve the noise performance.
With Iridium, you can use compatible 24 bit/96kHz ‘Null Cab’ IR files to use as a ‘bypassed cab’ that you can load to either side (LEFT or RIGHT or BOTH) of the 9 Cab Slots with the Strymon Impulse Manager software.
The ‘Null Cab’ files are useful for bypassing one or both sides of the speaker cab processing on Iridium for different routing options.
There are 3 selectable amplifier models available via the TYPE switch on Iridium:
Iridium comes pre-loaded with 9 curated IR speaker cabinets from IR vendors that partnered with us to compliment each of the 3 amp types. You can select from one of 3 available IR speaker cabinets for each of the amps with the CAB switch.
The current consumption on Iridium can vary quite a bit depending on whether or not the pedal is being used with headphones. Iridium requires 9V DC center-negative power and between 300-500mA of current depending on usage:
NOTE: The factory power supply that is included with Iridium provides enough power to cover both use cases above.
All Strymon pedals sold within North America (except OB.1) include a 9VDC 660mA power supply. OB.1 includes a 9V battery.
We don’t recommend using daisy chain power supplies. Ground loops are commonly caused when using a daisy chain power cable to power multiple pedals. This creates a ground loop between every pedal in the daisy chain. Ground loops allow stray magnetic fields to introduce hum into your signal path.
If the only type of effect you use is distortion you may not have (or hear) the ill effects. But, if you have modulation and delay pedals the likelihood of ground loops wreaking havoc on your signal is high.
If you don’t plan on using the included power adapter, we recommend an isolated power supply. An isolated supply works by using a transformer (or multiple transformers) to keep every power outlet completely electrically isolated. We offer two fully-isolated, high current DC power supplies, Ojai and Zuma. Click below for more info:
Mac:
Open the disk image, then, drag and drop the “Strymon Impulse Manager” icon to the “Applications” folder.
Windows:
Double click the “Strymon Impulse Manager 1.00.2” installer.
Mac 10.14 – 10.15
Windows 10
To connect your Iridium pedal to the Strymon Impulse Manager software, connect your powered Iridium to your computer using the USB-mini cable that is included with the pedal. Once connected, start the Strymon Impulse Manager software.
Once you have connected your powered Iridium to the computer using the included USB-mini cable, start the Strymon Impulse Manager application. The program will automatically detect the connected pedal.
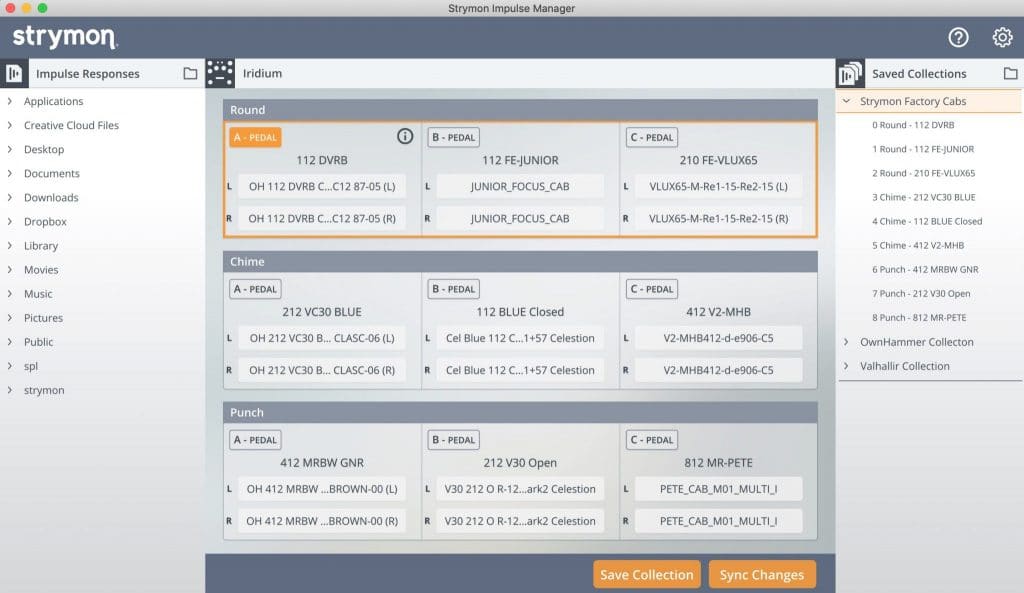
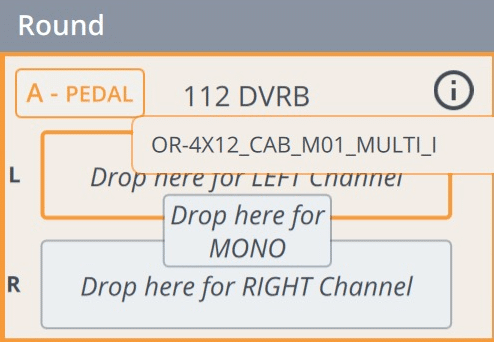
The center of the program shows Iridium’s 9 Cab Slots (3 per AMP type) and will automatically populate with the contents from the connected pedal’s memory. Each Cab Slot contains 2 mono or 1 stereo impulse response (IR) file along with the respective name for each slot.
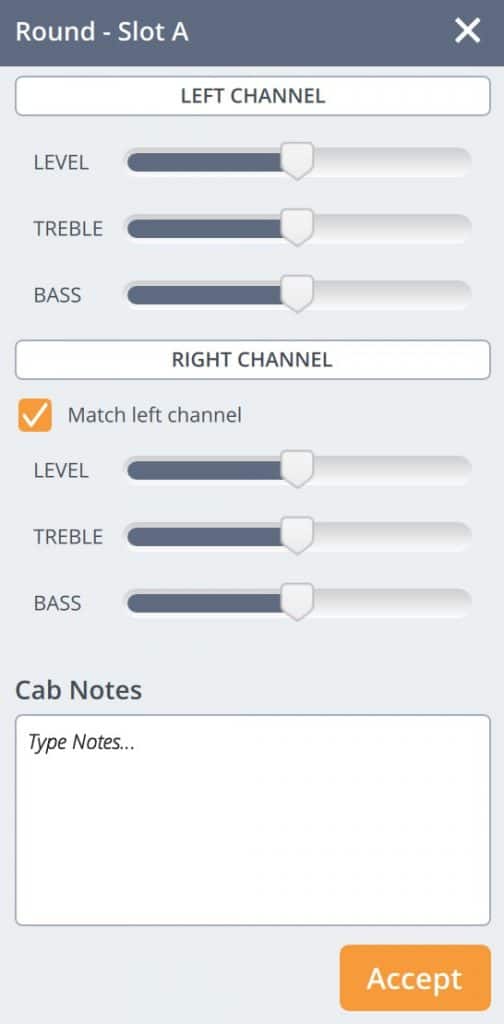
At the bottom of this window, there is a Cab Notes field where you can enter details on your cab settings. For the factory cabs that are included with Iridium, the Cab Notes field shows the IR vendor that provided us with the IR cab file(s) in the currently selected Cab Slot.
Once you have made your changes in the Info window, press the ACCEPT button to close this window.
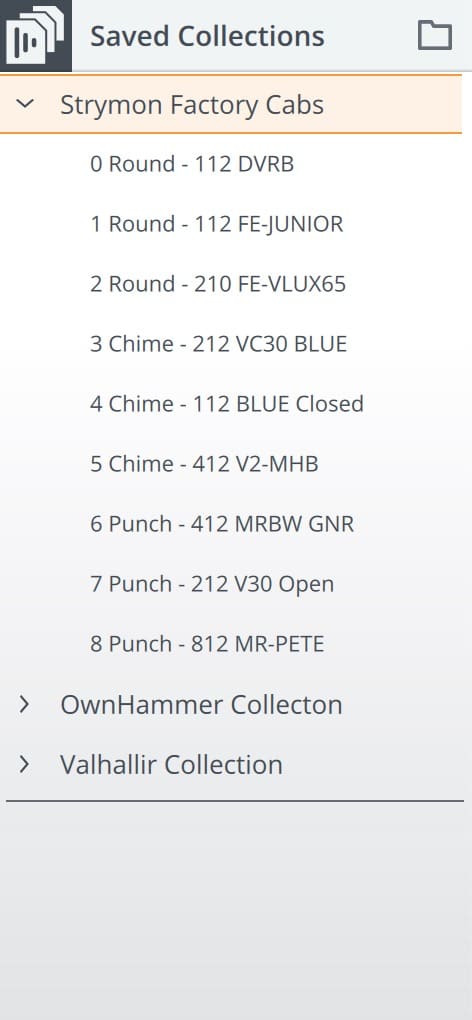
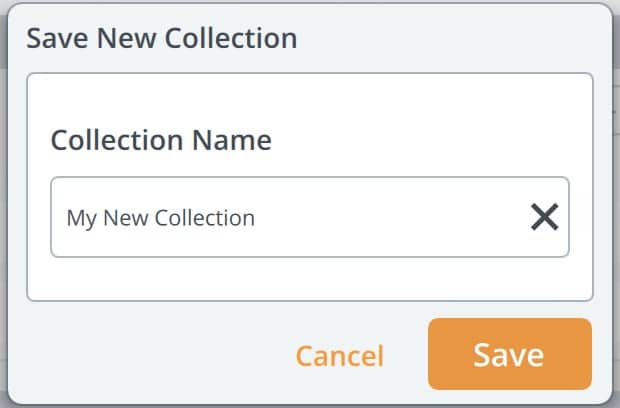
On the right side of the application is the Saved Collections column. Each collection is a snapshot of the IR cab file settings of your Iridium pedal saved as a folder containing all 9 IR cabs from the pedal’s memory.
At the top of this column, you will find a copy of the Strymon Factory Cabs that come with Iridium along with some additional cab collections put together by some of the IR cab vendors that partnered with us.
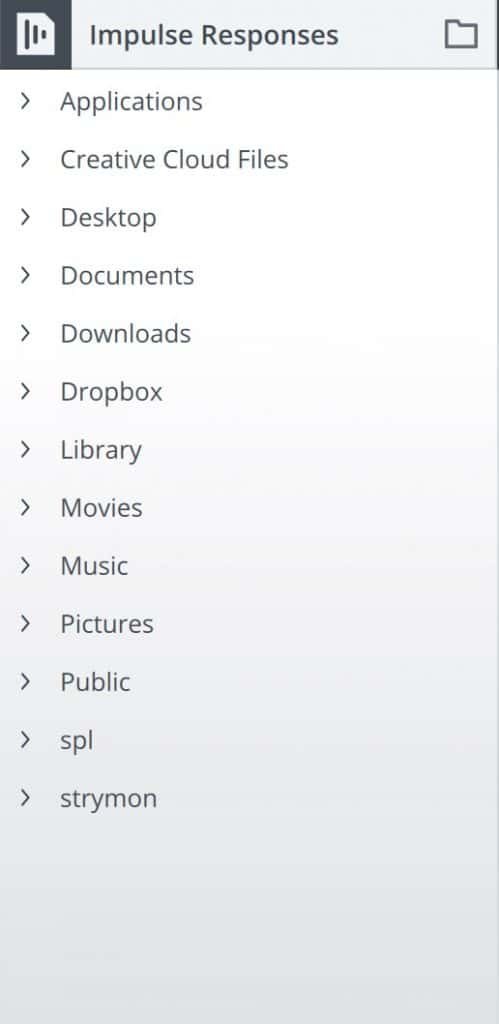
On the left side of the application is the Impulse Responses column where you can browse your computer’s hard drive for any 3rd party or custom 24-bit 96 kHz impulse response wave files of up to 500ms in length that you own.
To update the firmware on your Iridium to the latest version, download and install our Strymon Update software below:
Strymon Update v1.75 Download
System Requirements
Mac 10.14 or higher
Windows 10 or higher
Once you have downloaded and installed Strymon Update:
We always work hard to improve the experience our customers have with our products. The release notes below list the new features we’ve added to Iridium and/or issues we’ve resolved. Download the Strymon Update software to update the firmware on your Iridium.
Iridium Firmware REV v1.19 (Released July 2020)
What’s Fixed?
What’s new?
Iridium Firmware REV v1.17 (Released April 2020)
What’s Fixed?
Iridium Firmware REV v1.16 (Released March 2020)
What’s Fixed?
Iridium Firmware REV v1.12 (Released December 2019)
What’s fixed?
If you run into trouble while updating your device with the Strymon Update application, you may see some text in the software or behavior on your device that may be different than normal.
There are 2 parts to the firmware update: the USER and DSP firmware. When you first connect a Magneto module with the original factory firmware, the ‘installed version’ will show as ‘1.00’. If the update is interrupted on your device, and only one part of the update is installed, the ‘installed version’ may show something different. For example, if the USER code is updated, but the DSP code is still the original factory version it may show ‘D114-U042’ showing that the two parts of the firmware are out of sync. If this happens:
If you have trouble during a firmware update, you may see one or more LED’s on the unit blinking white. This indicates that the device is in ‘Update Mode’ and is waiting to perform the update. The Strymon Update software will recognize your device as ‘strymon_recover’ while in this mode. You have 2 options to recover your device back to normal functionality:
If you continue to have trouble, please contact Strymon support by sending an email to support@strymon.net with full details on the problem, which device you are using, your computer system and connections, and any error messages you have received.
Strymon Non-Transferrable Limited Warranty
Strymon warranties its products and their varying components to be free from defects in material and workmanship for the following periods of time from the original date of purchase when purchased from an Authorized Strymon Dealer:
If the product fails within the warranty period, Strymon will repair or, at our discretion, replace the product at no cost to the original purchaser.
This warranty covers defects in manufacturing discovered while using this product as recommended by Strymon. This warranty does not cover loss or theft, nor does the coverage extend to damage caused by misuse, abuse, unauthorized modification, improper storage, lightning, or natural disasters. Damage caused by any of the above circumstances may result in a non-warranty repair fee.
Products that were purchased from an unauthorized dealer are not covered under warranty. The warranty is non-transferrable and does not cover used or second-hand products.
In the case of malfunction, the purchaser’s sole recourse shall be repair or replacement, as described in the preceding paragraphs. Strymon will not be held liable to any party for damages that result from the failure of this product. Damages excluded include, but are not limited to, the following: lost profits, lost savings, damage to other equipment, and incidental or consequential damages arising from the use, or inability to use this product. In no event will Strymon be liable for more than the amount of the purchase price, not to exceed the current retail price of the product. Strymon disclaims any other warranties, express or implied. By using the product, the user accepts all terms herein.
For North American customers: Contact Strymon through our website at http://www.strymon.net/support for Return Authorization and information. Proof of original ownership may be required in the form of a purchase receipt.
For International Customers: Contact the Strymon dealer from which the product was purchased from in order to arrange warranty repair service.
To locate your nearest authorized Strymon dealer, please use the following link:
You can also contact Strymon directly at (805) 468-8788 or (800) 980-8160 for help finding your nearest authorized Strymon dealer.
Strymon products purchased from an authorized dealer are covered by a manufacturer’s warranty. A purchase receipt from an authorized dealer is required with any request for warranty service.
Please note that any Strymon products that have been purchased from an unauthorized dealer are not eligible for coverage under the manufacturer’s warranty. If you are uncertain, please contact Strymon directly at (805) 468-8788 or (800) 980-8160 before your purchase.
***NOTE: Warranties for Strymon products are non-transferrable. Second-hand items, including sales from websites such as craigslist, Ebay, and Reverb are not covered by a manufacturer’s warranty. Furthermore, there are no authorized dealers on Amazon, Ebay, or Reverb selling “NEW” Strymon products in the USA.***
Your warranty is valid in the region of purchase. For example, if you buy your product in Japan, any service-related issues will need to be handled in Japan. Products purchased in the United States can only be repaired in the United States.
General Inquiries info@strymon.net
Technical Support support@strymon.net
Questions About Orders orders@strymon.net